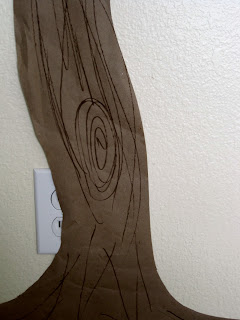
Nope. Not a typo. It's part of my celebration of National Poetry Month!
As an English teacher, I really enjoyed teaching classes that were organized by genre. Chronological study has it's merits, but I love the focus genre study brings. And I especially loved that I could schedule in our study of poetry during April and National Poetry Month.
One of my favorite things to do with poetry in the classroom was to build a poetree. The original idea is not mine, and I'm sad to say that I don't remember where I saw it. But these 6 ideas to utilize a poetree are indeed mine and I love them!
Basic supplies needed:
brown paper (sometimes they have rolls of packing paper at the dollar store)
green construction paper (for leaves)
a little creativity and artistry (just a little I promise)
and whatever else you need for the leaves once you pick an idea!
Step 1: Create the tree. Either draw it out or freehand your cutting but the great thing is that trees are easy. I can draw stick figures and trees. And my trees are better. You don't need many branches, they'll be filled up with leaves.
Step 2: Tape it to your wall.
Step 3: Add some character. Again, no real art talent needed . . .
Step 4: Add your leaves. Again, freehand it -- these particular leaves take up half of a sheet of construction paper. In the classroom, I used full sheets and had a much larger, fantastically full tree. Do you know what this does for the high school--no windows--bad paint--pipes exposed--classroom? My kids loved it -- and were definitely not too cool to make it known that they loved it.
Step 5: Use the tree. How? Well, here's 6 ways to do just that. Feel free to modify for your children's (your own or students) interests and age ranges.
- Have kids write poems on leaves and post them on the tree.
- Build your tree complete with leaves that already have poems on them. Choose one each day to read aloud and savor.
- Write poetry related activities on each leaf and allow the choosing of a leaf to direct your teaching / learning for the day.
- Use the tree to give a visual organization of different types of poetry: Branches can be types with individual leaves holding representative poems as examples. Variation -- poetry terminology with examples as the leaves. Of course this would require more branches . . .
- This is a perfect opportunity for a mini-research project. Assign (or have them choose) each child a poet and have them do the research. All research should be written on the leaf -- short and sweet but a great opportunity to teach the basics in that area as well.
- For very young children (this is what I'm going to do with my 3 year old), place flashcards on one side with pairs of rhyming words. Introduce your children to rhyme and have them pick leaves from the tree and match the rhyming pairs. Variation: if your child is a beginning reader, have them use it to practice sight words or understand how words can rhyme but not be spelled exactly the same.
These flashcards are a combination of Winnie the Pooh and Playskool beginning word sets that I picked up at the dollar store. I'm pretty sure though that I have seen rhyming flash cards at Target in their dollar aisles as we get closer to the beginning of school.
If you're less artistically inclined than even I, use a real or fake tree as your base and embellish from there.
I know there are many more ways to use this and if you're willing to share, I would love to hear your lightbulbs! Have fun with it and use it to celebrate poetry, not wallow in it.


